In this chapter we shall learn about git branching and merging related commands.
git branch
git checkout
git merge
git mergetool
git stash
git worktree
git branch
1. git branch is an option, where in you create a separate branch in the from the master branch.
2. You might be developing a feature and that you don’t want to continue in the master branch, till the testing has been completed.
3. In that case, you will create a separate branch and work in that branch, once the branch is stable, then you can proceed to merge with the master branch.
We shall see the list of options that “git branch” is having through series of examples:
1. To create a new branch, use “git branch <branch_name>”, then we check the list of branches by using “git branch” command.

2. To delete a branch, use “git branch -d <branch_name>”
3. To rename a branch, use “git branch -m <old_branch_name> <new_branch_name>”
git checkout
In the above example, we saw how to create a branch. But once you create a branch, how to use the new branch ?
1. To use the new branch use “git checkout”
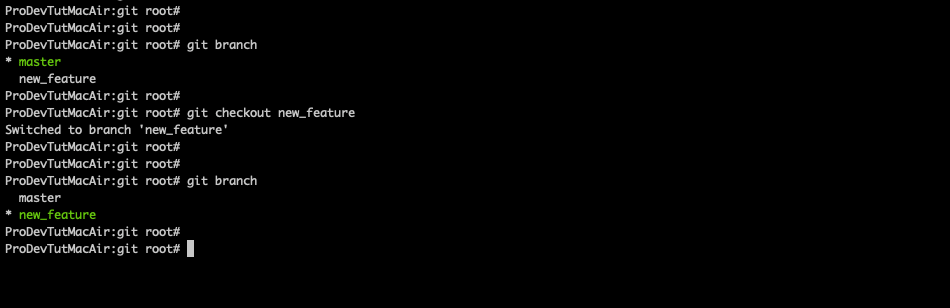
One you have switched to new branch, you can start making your changes.
2. To switch to main branch, use “git checkout -m master”
3. To create and switch to a branch, use “git checkout -b <branch_name> ”
git merge
Once you have checked-out to a new branch and made the changes, how do you merge those changes to a new branch?
To do that, use “git merge” option.
Before we merge, we shall add below line to myProg.c file in the new branch.
printf(“New line added from new_feature branch”);
Once the changes have been completed, you need to add the changes by using “git add .” and commit the changes by using “git commit -m “new feature” ” command.
This will commit the changes to the “new_feature” branch.
Now that we have made the changes and committed the changes to the new branch, how to merge them to the master branch?
To do that, it is a 2 step process:
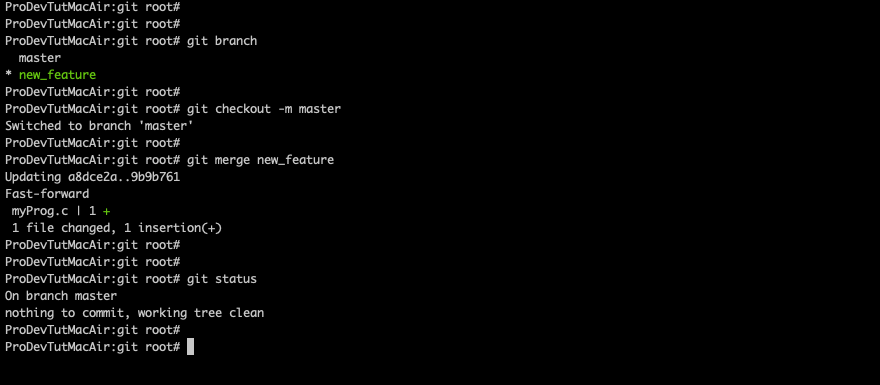
Step 1: Checkout to master branch by using “git checkout -m master”
Step 2: Use “git merge <branch_name>” to merge that branch to the master branch
Example:
I have merged “new_feature” branch to “master” branch.
git mergetool
Sometime there will be merge conflicts, at that time you need to use “git mergetool” to resolve the conflict.
git stash
When to use git stash, a generic scenario
Suppose you are working on branch A and you need to work on branch B, before being commit to branch A. Then you can stash your changes on A, then checkout B and continue with the work.
Then you can checkout branch A and apply the stash.
So generally we use “git stash” to save un-committed changes in a stash, the changes will be removed from working tree.
How to check the list of stash ?
“git stash list” is the command used to get the list of stash
Example:
git stash list
stash@{0}: my stash 1
stash@{1}: my stash 2
stash@{2}: my stash 3
How to create a stash?
Use the command “git stash save “my message” “.
Example:
git stash save “my stash 4”
How to delete a stash?
Use the command “git stash drop <stash-name> ”
How to apply a stash?
Use the command “git stash apply <stash-name>”